- Messages
- 436
- Points
- 28
How to Activate and View a Hikvision Camera on a Mac
Typically, support for surveillance cameras on a Mac is quite limited. Many manufacturers limit their camera's plugins to only work with Internet Explorer, and video management software is often not developed for or compatible with Mac OS. In the past, this has often been a problem for Mac users who either can't setup or view their cameras without a Windows PC which they might not have access to.
This problem was then further exacerbated by Hikvision's security firmware update, V5.3.0, which necessitated users activate their cameras before being able to configure or indeed access them at all. This wasn't possible on current versions of the Mac version of iVMS 4200.
Thankfully, starting from iVMS 4200 V1.02.02.02 (which you can grab from the Resources section of our Forum) this is now possible, and Mac users will be able to activate, configure and view their cameras without requiring a Windows PC at all.
The process is fairly straightforward and is covered below.
_________________________________
Downloading iVMS 4200 V1.02.02.02
We've recently uploaded a beta version of iVMS 4200 for Mac, V1.02.02.02, in the Resources section of our website linked above. We've had a chance to test and play with it on a Mac we have in the office, and it is currently the only version of iVMS that allows you to activate the cameras which, as previously mentioned, now come inactive.
You'll need this installed to proceed further.
Do keep in mind that whilst we've not encountered any bugs or issues, it is still a beta version and there might be a couple we're unaware of. We will keep the resource updated with future releases however, and it's highly unlikely that Hikvision would remove such key functionality in future updates so you shouldn't have to worry if the version number is different to what is mentioned in this guide.
Activating the Camera
Once you've installed iVMS 4200, you'll be greeted with the below. Users of the Windows version of iVMS 4200 will find it very familiar.
Navigate to Device Management, and then click on the Show Online Devices button.
You'll be greeted with another window which will scan your network for any Hikvision devices that are currently connected. This is essentially a built-in version of SADP which many users may be familiar with, and is where we'll be activating the camera. You can also change the network settings of any listed devices here too, but only once they've been activated.
In the list, look down the "Safe Status" column. Any inactive devices will be listed as Inactive. In the below image, there's only one I wish to activate - a DS-2CD2142FWD-I. Once you've selected it in the list, click the Activate button.
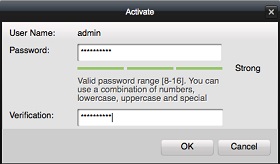
A window like the one below will appear in which you'll be prompted to activate the camera with a strong password. It is highly recommended you set a "Strong" password as defined by the device as this will eliminate any potential compatibility issues with other devices such as an NVR (we see this problem too often!).

Viewing your Hikvision Device
You can view your Hikvision camera or NVR in a few ways.
Now that you know the IP address of the activated device (see above), you can enter it into a web browser such as Safari or Firefox and connect to it this way. However, as we're already in iVMS 4200, we'll add your device and view it this way too.
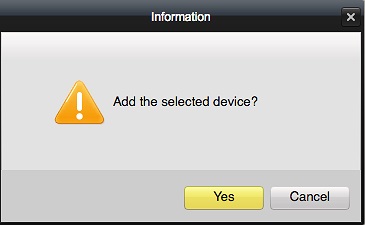
Once again, in the same "Show Online Devices" list as above, select the device you wish to add in the list and then click the Select Device button in the bottom right, indicated below. You'll be greeted with a confirmation window - select Yes.


Tick Export To Group and then hit the Add button.
A confirmation window should appear and you'll be able to see the device listed in the Device Management window. Your device is now added to iVMS 4200.
Viewing Your Camera
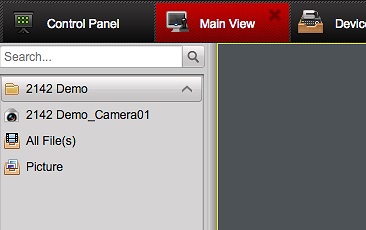
There's just a couple of easy steps after this point to view your camera. Go back to the Control Panel tab (the screen you're greeted with when you first open the application) and select Main View this time.
You should be greeted with a large blank grey screen and a column to the left which contains any groups of devices you might have set, such as External Cameras for example. In the column will be a folder with the same name as the nickname you set for the camera previously. Click it, and a dropdown menu will appear.
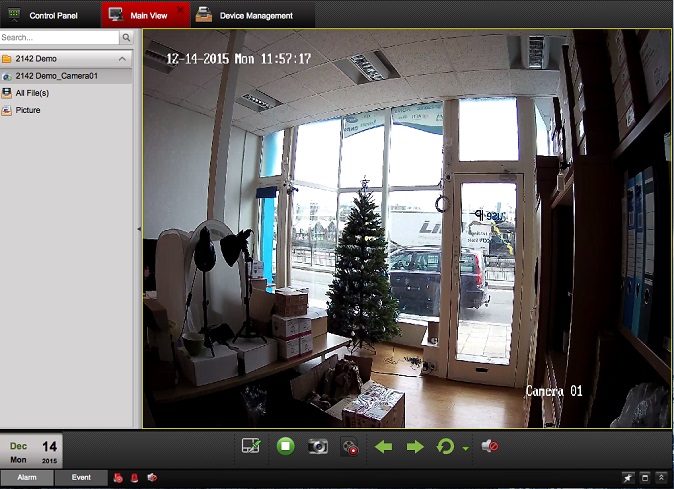
Your camera will be contained within. Select the camera from the list and hit play, or simply drag it from the list into the grey space to view a live feed. You can do this to view a number of cameras simultaneously.


You'll now be able to view and configure your cameras in the same manner as you would on a Windows machine, either via iVMS 4200 or through a web browser.
If you do bump into any issues along the way, please feel free to leave a reply and we'll try and help you out.
Update 24th June 2018
Please follow this link to a newer post with the latest Hikvision downloads for Mac users
Last edited by a moderator:


